Hey y'all! How's the weekend been treating you? Me as usual being the good girl driving my grandma and brother up and down and running errands cause Chinese New Year is coming! Can't wait for my cousins to come back.
So today I spent the whole afternoon editing the html code for my blog design which I got the template from www.iksandi.com. This is what I'm looking for clean and elegant template, where LESS IS MORE.
Transforming from this:
to THIS:
Well, obviously this is what you are looking at it now. Haha...
Anyone of you are interested to have this design do drop by to his blog and download and instruction are written clearly. Just in case that anyone of you are blur on how to link your own social media, here are some guide line. This is what I've been doing the whole afternoon figuring out how to link my own social platform and finally I did it! Giving myself a thumbs up for a girl who has no knowledge with html coding.
In order to get your social link work... Here's what you gonna do:
Go to Template > Edit HTML
Find the code as shown in the picture below:
See the line underline in red, this is where you add your resource residing (eref). Let's say that if u want viewers to open the link at another new window or tab add in target='_blank' which you can see the green underlined. That's it!
Celebrated our first year anniversary at Gunter's on the 10th of January. This post is so belated due to busying with family stuffs. Grew up in KK for so long this is my first time coming here to dine. Got to say that the environment are not bad. Food was nice. My boyfriend said that the service and decorating reminds him of Philippines.
So yeah, we didn't ordered much cause boyfriend is not feeling well. He got food poisoning a day before. Beef Steak and and Penne with Mushroom and Chicken is what we ordered. Sorry for the bad quality pictures. Heh~
This pretty sums up food hunt while the boyfriend is here for 2 whole weeks:
Sophiaticated was given by a dearest friend many years ago. I remember that time she's very particular on how us girls should be sophisticated, have our own style, personality and so forth. Sophia + sophisticated = SOPHIATICATED
In love with PINK, not to the extent that my future car is in pink too. I still believe that things should match with their respective colours so they look elegant!
I'm pure Chinese born with a tan skin and I'm damn proud of it.
I'm 5'5"
I'm a Pieces
Born and raise in the land below the wind, Sabah
An engineering student
Often quite in public, but once you get to know me I'mma crazy bitch!
A music junkie
Lauren Conrad is my one and only idol
Appreciate local and fine food
Couldn't get enough of English breakfast, Korean food, desert and Haagen Dazs' strawberry flavor
Obsess with home decor
Hand phone is the most important thing on earth
Apps that I can't live without are my Whatsapp and Instagram
Super love shopping and travelling. Err, actually travelling = shopping, not much of a scenery person
Enjoys driving! Driving kinda calms my mind especially at night
Enjoys water sport even though I couldn't as long as I have my life jacket with me
A chocolate addict. My granny have to hide it away from me every chocolate in the house
I have this weird habit that when I bought stuffs, I like to put them beside my bed and sleep through few nights
Here I am having my semester break I got nothing but time to do things wanna do and surf the net like nobody business. Currently I have been obsessing with diy home decor stuff. Well, blame it on Pinterest! Haha.... Joking. I love Pinterest to the max! Pinterest are the best place to get inspired for almost all things.
One of the thing that I want to do when I get back to Kuching is to decorate my wall with photos. Most of the photos. A polaroid photos will be way better looking than the normal 4R photo collage even though I haven't decide how I want to do with it or place it. This have to wait til I get back to Kuching and figure it out how I should I decorate my room. So, stay tune til my next, next................ next post?
There are many online website that offers to print your photos in polaroid and most of them need to pay. Ever think of printing your own polaroid photo? As I google on polaroid photo, I stumble upon this website, Wonderforest on how to diy your own instagram polaroid photos.
As I saw this post, both of my eye got lighten up and immediately got myself into a work mood. :D Okay, so here are the following steps to diy your own instagram polaroid photos:
At her website, there is a ready made polaroid template, click here and download it.
Go to Pixlr, choose "open image from computer" and open the template that you have saved previously
Now, open a new tab and go to Collecto to choose your favorite instagram photos and a larger image will appear. For me, I use Iconsquare instead of Collecto.
Right click on the photo and click "copy image location/URL"
Go back to Pixlr, click "open image location" under the LAYER on your menu bar.
Paste the "image location" in the box (CTRL + V, ENTER/ right click, paste). Your image will be added as a new layer to the document.
In the Layer panel on the right hand side, click on Layer 0 and paste the second "image location"
Repeat it for the 3rd and 4th photo.
Still blur? Click the video below and watch how they do it.
Here's another way to do it if you have your square pictures store at your comp/lappy which I learn myself.
At Pixlr, under LAYER, click "open image as layer"
To re-size the photo, under EDIT, click "Free transform..."
Under TOOLS, click "Move tool"
For the photos to fit perfectly of course they are few steps to be taken. Now, some of you may think that its a lot of work, I think its worth it cause I get to familiar with pixlr (P/S: This is my first time using pixlr) and learn how to deal with photos when the layer you're importing are too big or small. So, there there.... I've printed mine. Go have it a try! I see you in my next post. :)
October Coffee Cafe which located at The Peak Vista is one of my favorite spot to chill. Owned by a Korean owner and their 2nd branch is opening soon at Gaya Street. Coffee beans is imported from Korea and the beans is roasted daily by the owner himself/herself.
So after spending the evening at town yesterday, me and the bf dropped by to chill a little before heading home.
Since I hop on the plane back to KK for my semester break, the first person I called is my hairstylist. She's the only person who understand how I wanted and she's been cutting my hair for almost more than 3 years. Unless my fringe is disturbing me I have no choice to find a barber back in Kuching.
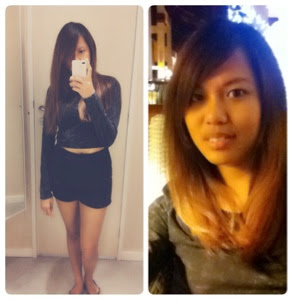
So yeah, when I reached there my hairstylist asked what happen to my hair??!!! Yeap, I know its really, really dead and a lot of split end. That is why I decided to trim it SHORT. Well, not that short, still passes the shoulder length.
Before After
Therefore, I asked her is doing treatment at home helps? Cause I don't want to spend money on doing treatment at saloon as I mention in my previous post that studying in Swinburne is making me broke. I have to be careful on what I spent, also doing hair treatment at home I get do other things while doing the treatment.
The answer is YES according to my hairstylist. This is the way that she taught me:
shampoo your hair and towel dry your hair. Make sure there is no water dripping from your hair.
Apply proper amount of treatment to your hair.
Use a shower cap to cover your hair and wait for 10 to 15 mins will do.
The purpose of using the shower cap is to lock the moisture so that it doesn't escape. Here's another FYI: Ever feel that doing treatment at home doesn't work for you? Cause usually we do our treatment while we were showering? That is why my hairstylist insist me to do in towel dry condition as the hair contain less water the treatment are easily to absorb. Well, its logic right come to think of it? Water keep dripping, how is the hair going to absorb?
Hope this tip helps you. Good luck and I talk to you in my next post.
.png)


